Gameplay
Need help with the tutorial? Join our Discord server!
This progressive tutorial is continued from part 2.
Spawning Food
- Rust
- C#
Let's start by spawning food into the map. The first thing we need to do is create a new, special reducer called the init reducer. SpacetimeDB calls the init reducer automatically when first publish your module, and also after any time you run with publish --delete-data. It gives you an opportunity to initialize the state of your database before any clients connect.
Add this new reducer above our connect reducer.
// Note the `init` parameter passed to the reducer macro.
// That indicates to SpacetimeDB that it should be called
// once upon database creation.
#[spacetimedb::reducer(init)]
pub fn init(ctx: &ReducerContext) -> Result<(), String> {
    log::info!("Initializing...");
    ctx.db.config().try_insert(Config {
        id: 0,
        world_size: 1000,
    })?;
    Ok(())
}
This reducer also demonstrates how to insert new rows into a table. Here we are adding a single Config row to the config table with the try_insert function. try_insert returns an error if inserting the row into the table would violate any constraints, like unique constraints, on the table. You can also use insert which panics on constraint violations if you know for sure that you will not violate any constraints.
Now that we've ensured that our database always has a valid world_size let's spawn some food into the map. Add the following code to the end of the file.
const FOOD_MASS_MIN: i32 = 2;
const FOOD_MASS_MAX: i32 = 4;
const TARGET_FOOD_COUNT: usize = 600;

fn mass_to_radius(mass: i32) -> f32 {
    (mass as f32).sqrt()
}

#[spacetimedb::reducer]
pub fn spawn_food(ctx: &ReducerContext) -> Result<(), String> {
    if ctx.db.player().count() == 0 {
        // Are there no logged in players? Skip food spawn.
        return Ok(());
    }

    let world_size = ctx
        .db
        .config()
        .id()
        .find(0)
        .ok_or("Config not found")?
        .world_size;

    let mut rng = ctx.rng();
    let mut food_count = ctx.db.food().count();
    while food_count < TARGET_FOOD_COUNT as u64 {
        let food_mass = rng.gen_range(FOOD_MASS_MIN..FOOD_MASS_MAX);
        let food_radius = mass_to_radius(food_mass);
        let x = rng.gen_range(food_radius..world_size as f32 - food_radius);
        let y = rng.gen_range(food_radius..world_size as f32 - food_radius);
        let entity = ctx.db.entity().try_insert(Entity {
            entity_id: 0,
            position: DbVector2 { x, y },
            mass: food_mass,
        })?;
        ctx.db.food().try_insert(Food {
            entity_id: entity.entity_id,
        })?;
        food_count += 1;
        log::info!("Spawned food! {}", entity.entity_id);
    }

    Ok(())
}
In this reducer, we are using the world_size we configured along with the ReducerContext's random number generator .rng() function to place 600 food uniformly randomly throughout the map. We've also chosen the mass of the food to be a random number between 2 and 4 inclusive.
Let's start by spawning food into the map. The first thing we need to do is create a new, special reducer called the Init reducer. SpacetimeDB calls the Init reducer automatically when you first publish your module, and also after any time you run with publish --delete-data. It gives you an opportunity to initialize the state of your database before any clients connect.
Add this new reducer above our Connect reducer.
// Note the `init` parameter passed to the reducer macro.
// That indicates to SpacetimeDB that it should be called
// once upon database creation.
[Reducer(ReducerKind.Init)]
public static void Init(ReducerContext ctx)
{
    Log.Info($"Initializing...");
    ctx.Db.config.Insert(new Config { world_size = 1000 });
}
This reducer also demonstrates how to insert new rows into a table. Here we are adding a single Config row to the config table with the Insert function.
Now that we've ensured that our database always has a valid world_size let's spawn some food into the map. Add the following code to the end of the Module class.
const int FOOD_MASS_MIN = 2;
const int FOOD_MASS_MAX = 4;
const int TARGET_FOOD_COUNT = 600;

public static float MassToRadius(int mass) => MathF.Sqrt(mass);

[Reducer]
public static void SpawnFood(ReducerContext ctx)
{
    if (ctx.Db.player.Count == 0) //Are there no players yet?
    {
        return;
    }

    var world_size = (ctx.Db.config.id.Find(0) ?? throw new Exception("Config not found")).world_size;
    var rng = ctx.Rng;
    var food_count = ctx.Db.food.Count;
    while (food_count < TARGET_FOOD_COUNT)
    {
        var food_mass = rng.Range(FOOD_MASS_MIN, FOOD_MASS_MAX);
        var food_radius = MassToRadius(food_mass);
        var x = rng.Range(food_radius, world_size - food_radius);
        var y = rng.Range(food_radius, world_size - food_radius);
        var entity = ctx.Db.entity.Insert(new Entity()
        {
            position = new DbVector2(x, y),
            mass = food_mass,
        });
        ctx.Db.food.Insert(new Food
        {
            entity_id = entity.entity_id,
        });
        food_count++;
        Log.Info($"Spawned food! {entity.entity_id}");
    }
}

public static float Range(this Random rng, float min, float max) => rng.NextSingle() * (max - min) + min;

public static int Range(this Random rng, int min, int max) => (int)rng.NextInt64(min, max);
In this reducer, we are using the world_size we configured along with the ReducerContext's random number generator .Rng function to place 600 food uniformly randomly throughout the map. We've also chosen the mass of the food to be a random number between 2 and 4 inclusive.
We also added two helper functions so we can get a random range as either a int or a float.
Although, we've written the reducer to spawn food, no food will actually be spawned until we call the function while players are logged in. This raises the question, who should call this function and when?
We would like for this function to be called periodically to "top up" the amount of food on the map so that it never falls very far below our target amount of food. SpacetimeDB has built in functionality for exactly this. With SpacetimeDB you can schedule your module to call itself in the future or repeatedly with reducers.
- Rust
- C#
In order to schedule a reducer to be called we have to create a new table which specifies when and how a reducer should be called. Add this new table to the top of the file, below your imports.
#[spacetimedb::table(name = spawn_food_timer, scheduled(spawn_food))]
pub struct SpawnFoodTimer {
    #[primary_key]
    #[auto_inc]
    scheduled_id: u64,
    scheduled_at: spacetimedb::ScheduleAt,
}
Note the scheduled(spawn_food) parameter in the table macro. This tells SpacetimeDB that the rows in this table specify a schedule for when the spawn_food reducer should be called. Each scheduled table requires a scheduled_id and a scheduled_at field so that SpacetimeDB can call your reducer, however you can also add your own fields to these rows as well.
In order to schedule a reducer to be called we have to create a new table which specifies when an how a reducer should be called. Add this new table to the top of the Module class.
[Table(Name = "spawn_food_timer", Scheduled = nameof(SpawnFood), ScheduledAt = nameof(scheduled_at))]
public partial struct SpawnFoodTimer
{
    [PrimaryKey, AutoInc]
    public ulong scheduled_id;
    public ScheduleAt scheduled_at;
}
Note the Scheduled = nameof(SpawnFood) parameter in the table macro. This tells SpacetimeDB that the rows in this table specify a schedule for when the SpawnFood reducer should be called. Each scheduled table requires a scheduled_id and a scheduled_at field so that SpacetimeDB can call your reducer, however you can also add your own fields to these rows as well.
You can create, delete, or change a schedule by inserting, deleting, or updating rows in this table.
You will see an error telling you that the spawn_food reducer needs to take two arguments, but currently only takes one. This is because the schedule row must be passed in to all scheduled reducers. Modify your spawn_food reducer to take the scheduled row as an argument.
- Rust
- C#
#[spacetimedb::reducer]
pub fn spawn_food(ctx: &ReducerContext, _timer: SpawnFoodTimer) -> Result<(), String> {
    // ...
}[Reducer]
public static void SpawnFood(ReducerContext ctx, SpawnFoodTimer _timer)
{
// ...
}In our case we aren't interested in the data on the row, so we name the argument _timer.
- Rust
- C#
Let's modify our init reducer to schedule our spawn_food reducer to be called every 500 milliseconds.
#[spacetimedb::reducer(init)]
pub fn init(ctx: &ReducerContext) -> Result<(), String> {
    log::info!("Initializing...");
    ctx.db.config().try_insert(Config {
        id: 0,
        world_size: 1000,
    })?;
    ctx.db.spawn_food_timer().try_insert(SpawnFoodTimer {
        scheduled_id: 0,
        scheduled_at: ScheduleAt::Interval(Duration::from_millis(500).into()),
    })?;
    Ok(())
}You can use ScheduleAt::Interval to schedule a reducer call at an interval like we're doing here. SpacetimeDB will continue to call the reducer at this interval until you remove the row. You can also use ScheduleAt::Time() to specify a specific at which to call a reducer once. SpacetimeDB will remove that row automatically after the reducer has been called.
Let's modify our Init reducer to schedule our SpawnFood reducer to be called every 500 milliseconds.
[Reducer(ReducerKind.Init)]
public static void Init(ReducerContext ctx)
{
    Log.Info($"Initializing...");
    ctx.Db.config.Insert(new Config { world_size = 1000 });
    ctx.Db.spawn_food_timer.Insert(new SpawnFoodTimer
    {
        scheduled_at = new ScheduleAt.Interval(TimeSpan.FromMilliseconds(500))
    });
}You can use ScheduleAt.Interval to schedule a reducer call at an interval like we're doing here. SpacetimeDB will continue to call the reducer at this interval until you remove the row. You can also use ScheduleAt.Time() to specify a specific at which to call a reducer once. SpacetimeDB will remove that row automatically after the reducer has been called.
Logging Players In
Let's continue building out our server module by modifying it to log in a player when they connect to the database, or to create a new player if they've never connected before.
Let's add a second table to our Player struct. Modify the Player struct by adding this above the struct:
- Rust
- C#
#[spacetimedb::table(name = logged_out_player)][Table(Name = "logged_out_player")]Your struct should now look like this:
- Rust
- C#
#[spacetimedb::table(name = player, public)]
#[spacetimedb::table(name = logged_out_player)]
#[derive(Debug, Clone)]
pub struct Player {
    #[primary_key]
    identity: Identity,
    #[unique]
    #[auto_inc]
    player_id: i32,
    name: String,
}[Table(Name = "player", Public = true)]
[Table(Name = "logged_out_player")]
public partial struct Player
{
[PrimaryKey]
public Identity identity;
[Unique, AutoInc]
public int player_id;
public string name;
}This line creates an additional tabled called logged_out_player whose rows share the same Player type as in the player table.
IMPORTANT! Note that this new table is not marked public. This means that it can only be accessed by the database owner (which is almost always the database creator). In order to prevent any unintended data access, all SpacetimeDB tables are private by default.
If your client isn't syncing rows from the server, check that your table is not accidentally marked private.
- Rust
- C#
Next, modify your connect reducer and add a new disconnect reducer below it:
#[spacetimedb::reducer(client_connected)]
pub fn connect(ctx: &ReducerContext) -> Result<(), String> {
    if let Some(player) = ctx.db.logged_out_player().identity().find(&ctx.sender) {
        ctx.db.player().insert(player.clone());
        ctx.db
            .logged_out_player()
            .identity()
            .delete(&player.identity);
    } else {
        ctx.db.player().try_insert(Player {
            identity: ctx.sender,
            player_id: 0,
            name: String::new(),
        })?;
    }
    Ok(())
}

#[spacetimedb::reducer(client_disconnected)]
pub fn disconnect(ctx: &ReducerContext) -> Result<(), String> {
    let player = ctx
        .db
        .player()
        .identity()
        .find(&ctx.sender)
        .ok_or("Player not found")?;
    let player_id = player.player_id;
    ctx.db.logged_out_player().insert(player);
    ctx.db.player().identity().delete(&ctx.sender);

    Ok(())
}
Next, modify your Connect reducer and add a new Disconnect reducer below it:
[Reducer(ReducerKind.ClientConnected)]
public static void Connect(ReducerContext ctx)
{
    var player = ctx.Db.logged_out_player.identity.Find(ctx.Sender);
    if (player != null)
    {
        ctx.Db.player.Insert(player.Value);
        ctx.Db.logged_out_player.identity.Delete(player.Value.identity);
    }
    else
    {
        ctx.Db.player.Insert(new Player
        {
            identity = ctx.Sender,
            name = "",
        });
    }
}

[Reducer(ReducerKind.ClientDisconnected)]
public static void Disconnect(ReducerContext ctx)
{
    var player = ctx.Db.player.identity.Find(ctx.Sender) ?? throw new Exception("Player not found");
    ctx.Db.logged_out_player.Insert(player);
    ctx.Db.player.identity.Delete(player.identity);
}
Now when a client connects, if the player corresponding to the client is in the logged_out_player table, we will move them into the player table, thus indicating that they are logged in and connected. For any new unrecognized client connects we will create a Player and insert it into the player table.
When a player disconnects, we will transfer their player row from the player table to the logged_out_player table to indicate they're offline.
Note that we could have added a logged_in boolean to the Player type to indicated whether the player is logged in. There's nothing incorrect about that approach, however for several reasons we recommend this two table approach:
- We can iterate over all logged in players without any
ifstatements or branching - The
Playertype now uses less program memory improving cache efficiency - We can easily check whether a player is logged in, based on whether their row exists in the
playertable
This approach is more generally referred to as existence based processing and it is a common technique in data-oriented design.
Spawning Player Circles
Now that we've got our food spawning and our players set up, let's create a match and spawn player circle entities into it. The first thing we should do before spawning a player into a match is give them a name.
- Rust
- C#
Add the following to the bottom of your file.
const START_PLAYER_MASS: i32 = 15;

#[spacetimedb::reducer]
pub fn enter_game(ctx: &ReducerContext, name: String) -> Result<(), String> {
    log::info!("Creating player with name {}", name);
    let mut player: Player = ctx.db.player().identity().find(ctx.sender).ok_or("")?;
    let player_id = player.player_id;
    player.name = name;
    ctx.db.player().identity().update(player);
    spawn_player_initial_circle(ctx, player_id)?;

    Ok(())
}

fn spawn_player_initial_circle(ctx: &ReducerContext, player_id: i32) -> Result<Entity, String> {
    let mut rng = ctx.rng();
    let world_size = ctx
        .db
        .config()
        .id()
        .find(&0)
        .ok_or("Config not found")?
        .world_size;
    let player_start_radius = mass_to_radius(START_PLAYER_MASS);
    let x = rng.gen_range(player_start_radius..(world_size as f32 - player_start_radius));
    let y = rng.gen_range(player_start_radius..(world_size as f32 - player_start_radius));
    spawn_circle_at(
        ctx,
        player_id,
        START_PLAYER_MASS,
        DbVector2 { x, y },
        ctx.timestamp,
    )
}

fn spawn_circle_at(
    ctx: &ReducerContext,
    player_id: i32,
    mass: i32,
    position: DbVector2,
    timestamp: Timestamp,
) -> Result<Entity, String> {
    let entity = ctx.db.entity().try_insert(Entity {
        entity_id: 0,
        position,
        mass,
    })?;

    ctx.db.circle().try_insert(Circle {
        entity_id: entity.entity_id,
        player_id,
        direction: DbVector2 { x: 0.0, y: 1.0 },
        speed: 0.0,
        last_split_time: timestamp,
    })?;
    Ok(entity)
}
The enter_game reducer takes one argument, the player's name. We can use this name to display as a label for the player in the match, by storing the name on the player's row. We are also spawning some circles for the player to control now that they are entering the game. To do this, we choose a random position within the bounds of the arena and create a new entity and corresponding circle row.
Add the following to the end of the Module class.
const int START_PLAYER_MASS = 15;

[Reducer]
public static void EnterGame(ReducerContext ctx, string name)
{
    Log.Info($"Creating player with name {name}");
    var player = ctx.Db.player.identity.Find(ctx.Sender) ?? throw new Exception("Player not found");
    player.name = name;
    ctx.Db.player.identity.Update(player);
    SpawnPlayerInitialCircle(ctx, player.player_id);
}

public static Entity SpawnPlayerInitialCircle(ReducerContext ctx, int player_id)
{
    var rng = ctx.Rng;
    var world_size = (ctx.Db.config.id.Find(0) ?? throw new Exception("Config not found")).world_size;
    var player_start_radius = MassToRadius(START_PLAYER_MASS);
    var x = rng.Range(player_start_radius, world_size - player_start_radius);
    var y = rng.Range(player_start_radius, world_size - player_start_radius);
    return SpawnCircleAt(
        ctx,
        player_id,
        START_PLAYER_MASS,
        new DbVector2(x, y),
        ctx.Timestamp
    );
}

public static Entity SpawnCircleAt(ReducerContext ctx, int player_id, int mass, DbVector2 position, SpacetimeDB.Timestamp timestamp)
{
    var entity = ctx.Db.entity.Insert(new Entity
    {
        position = position,
        mass = mass,
    });

    ctx.Db.circle.Insert(new Circle
    {
        entity_id = entity.entity_id,
        player_id = player_id,
        direction = new DbVector2(0, 1),
        speed = 0f,
        last_split_time = timestamp,
    });
    return entity;
}
The EnterGame reducer takes one argument, the player's name. We can use this name to display as a label for the player in the match, by storing the name on the player's row. We are also spawning some circles for the player to control now that they are entering the game. To do this, we choose a random position within the bounds of the arena and create a new entity and corresponding circle row.
Let's also modify our disconnect reducer to remove the circles from the arena when the player disconnects from the database server.
- Rust
- C#
#[spacetimedb::reducer(client_disconnected)]
pub fn disconnect(ctx: &ReducerContext) -> Result<(), String> {
    let player = ctx
        .db
        .player()
        .identity()
        .find(&ctx.sender)
        .ok_or("Player not found")?;
    let player_id = player.player_id;
    ctx.db.logged_out_player().insert(player);
    ctx.db.player().identity().delete(&ctx.sender);

    // Remove any circles from the arena
    for circle in ctx.db.circle().player_id().filter(&player_id) {
        ctx.db.entity().entity_id().delete(&circle.entity_id);
        ctx.db.circle().entity_id().delete(&circle.entity_id);
    }

    Ok(())
}[Reducer(ReducerKind.ClientDisconnected)]
public static void Disconnect(ReducerContext ctx)
{
var player = ctx.Db.player.identity.Find(ctx.Sender) ?? throw new Exception("Player not found");
// Remove any circles from the arena
foreach (var circle in ctx.Db.circle.player_id.Filter(player.player_id))
{
var entity = ctx.Db.entity.entity_id.Find(circle.entity_id) ?? throw new Exception("Could not find circle");
ctx.Db.entity.entity_id.Delete(entity.entity_id);
ctx.Db.circle.entity_id.Delete(entity.entity_id);
}
ctx.Db.logged_out_player.Insert(player);
ctx.Db.player.identity.Delete(player.identity);
}Finally, publish the new module to SpacetimeDB with this command:
spacetime publish --server local blackholio --delete-dataDeleting the data is optional in this case, but in case you've been messing around with the module we can just start fresh.
Creating the Arena
Now that we've set up our server logic to spawn food and players, let's continue developing our Unity client to display what we have so far.
Start by adding SetupArena and CreateBorderCube methods to your GameManager class:
    private void SetupArena(float worldSize)
    {
        CreateBorderCube(new Vector2(worldSize / 2.0f, worldSize + borderThickness / 2),
            new Vector2(worldSize + borderThickness * 2.0f, borderThickness)); //North
        CreateBorderCube(new Vector2(worldSize / 2.0f, -borderThickness / 2),
            new Vector2(worldSize + borderThickness * 2.0f, borderThickness)); //South
        CreateBorderCube(new Vector2(worldSize + borderThickness / 2, worldSize / 2.0f),
            new Vector2(borderThickness, worldSize + borderThickness * 2.0f)); //East
        CreateBorderCube(new Vector2(-borderThickness / 2, worldSize / 2.0f),
            new Vector2(borderThickness, worldSize + borderThickness * 2.0f)); //West
    }

    private void CreateBorderCube(Vector2 position, Vector2 scale)
    {
        var cube = GameObject.CreatePrimitive(PrimitiveType.Cube);
        cube.name = "Border";
        cube.transform.localScale = new Vector3(scale.x, scale.y, 1);
        cube.transform.position = new Vector3(position.x, position.y, 1);
        cube.GetComponent<MeshRenderer>().material = borderMaterial;
    }
In your HandleSubscriptionApplied let's now call SetupArena method. Modify your HandleSubscriptionApplied method as in the below.
    private void HandleSubscriptionApplied(SubscriptionEventContext ctx)
    {
        Debug.Log("Subscription applied!");
        OnSubscriptionApplied?.Invoke();

        // Once we have the initial subscription sync'd to the client cache
        // Get the world size from the config table and set up the arena
        var worldSize = Conn.Db.Config.Id.Find(0).WorldSize;
        SetupArena(worldSize);
    }
The OnApplied callback will be called after the server synchronizes the initial state of your tables with your client. Once the sync has happened, we can look up the world size from the config table and use it to set up our arena.
In the scene view, select the GameManager object. Click on the Border Material property and choose Sprites-Default.
Creating GameObjects
Now that we have our arena all set up, we need to take the row data that SpacetimeDB syncs with our client and use it to create and draw GameObjects on the screen.
Let's start by making some controller scripts for each of the game objects we'd like to have in our scene. In the project window, right-click and select Create > C# Script. Name the new script PlayerController.cs. Repeat that process for CircleController.cs and FoodController.cs. We'll modify the contents of these files later.
Now let's make some prefabs for our game objects. In the scene hierarchy window, create a new GameObject by right-clicking and selecting:
2D Object > Sprites > Circle
Rename the new game object in the scene to CirclePrefab. Next in the Inspector window click the Add Component button and add the Circle Controller script component that we just created. Finally drag the object into the Project folder. Once the prefab file is created, delete the CirclePrefab object from the scene. We'll use this prefab to draw the circles that a player controls.
Next repeat that same process for the FoodPrefab and Food Controller component.
In the Project view, double click the CirclePrefab to bring it up in the scene view. Right-click anywhere in the hierarchy and navigate to:
UI > Text - Text Mesh Pro
This will add a label to the circle prefab. You may need to import "TextMeshPro Essential Resources" into Unity in order to add the TextMeshPro element. Your logs will say "[TMP Essential Resources] have been imported." if it has worked correctly. Don't forget to set the transform position of the label to Pos X: 0, Pos Y: 0, Pos Z: 0.
Finally we need to make the PlayerPrefab. In the hierarchy window, create a new GameObject by right-clicking and selecting:
Create Empty
Rename the game object to PlayerPrefab. Next in the Inspector window click the Add Component button and add the Player Controller script component that we just created. Next drag the object into the Project folder. Once the prefab file is created, delete the PlayerPrefab object from the scene.
EntityController
Let's also create an EntityController script which will serve as a base class for both our CircleController and FoodController classes since both Circles and Food are entities.
Create a new file called EntityController.cs and replace its contents with:
using SpacetimeDB.Types;
using System;
using System.Collections;
using System.Collections.Generic;
using System.Linq;
using Unity.VisualScripting;
using UnityEngine;

public abstract class EntityController : MonoBehaviour
{
    const float LERP_DURATION_SEC = 0.1f;

    private static readonly int ShaderColorProperty = Shader.PropertyToID("_Color");

    [DoNotSerialize] public int EntityId;

    protected float LerpTime;
    protected Vector3 LerpStartPosition;
    protected Vector3 LerpTargetPosition;
    protected Vector3 TargetScale;

    protected virtual void Spawn(int entityId)
    {
        EntityId = entityId;

        var entity = GameManager.Conn.Db.Entity.EntityId.Find(entityId);
        LerpStartPosition = LerpTargetPosition = transform.position = (Vector2)entity.Position;
        transform.localScale = Vector3.one;
        TargetScale = MassToScale(entity.Mass);
    }

    public void SetColor(Color color)
    {
        GetComponent<SpriteRenderer>().material.SetColor(ShaderColorProperty, color);
    }

    public virtual void OnEntityUpdated(Entity newVal)
    {
        LerpTime = 0.0f;
        LerpStartPosition = transform.position;
        LerpTargetPosition = (Vector2)newVal.Position;
        TargetScale = MassToScale(newVal.Mass);
    }

    public virtual void OnDelete(EventContext context)
    {
        Destroy(gameObject);
    }

    public virtual void Update()
    {
        // Interpolate position and scale
        LerpTime = Mathf.Min(LerpTime + Time.deltaTime, LERP_DURATION_SEC);
        transform.position = Vector3.Lerp(LerpStartPosition, LerpTargetPosition, LerpTime / LERP_DURATION_SEC);
        transform.localScale = Vector3.Lerp(transform.localScale, TargetScale, Time.deltaTime * 8);
    }

    public static Vector3 MassToScale(int mass)
    {
        var diameter = MassToDiameter(mass);
        return new Vector3(diameter, diameter, 1);
    }

    public static float MassToRadius(int mass) => Mathf.Sqrt(mass);
    public static float MassToDiameter(int mass) => MassToRadius(mass) * 2;
}
The EntityController script just provides some helper functions and basic functionality to manage our game objects based on entity updates.
One notable feature is that we linearly interpolate (lerp) between the position where the server says the entity is, and where we actually draw it. This is a common technique which provides for smoother movement.
If you're interested in learning more checkout this demo from Gabriel Gambetta.
At this point you'll have a compilation error because we can't yet convert from SpacetimeDB.Types.DbVector2 to UnityEngine.Vector2. To fix this, let's also create a new Extensions.cs script and replace the contents with:
using SpacetimeDB.Types;
using UnityEngine;

namespace SpacetimeDB.Types
{
    public partial class DbVector2
    {
        public static implicit operator Vector2(DbVector2 vec)
        {
            return new Vector2(vec.X, vec.Y);
        }

        public static implicit operator DbVector2(Vector2 vec)
        {
            return new DbVector2(vec.x, vec.y);
        }
    }
}
This just allows us to implicitly convert between our DbVector2 type and the Unity Vector2 type.
CircleController
Now open the CircleController script and modify the contents of the CircleController script to be:
using System;
using System.Collections.Generic;
using SpacetimeDB;
using SpacetimeDB.Types;
using UnityEngine;

public class CircleController : EntityController
{
    public static Color[] ColorPalette = new[]
    {
        //Yellow
        (Color)new Color32(175, 159, 49, 255),
        (Color)new Color32(175, 116, 49, 255),

        //Purple
        (Color)new Color32(112, 47, 252, 255),
        (Color)new Color32(51, 91, 252, 255),

        //Red
        (Color)new Color32(176, 54, 54, 255),
        (Color)new Color32(176, 109, 54, 255),
        (Color)new Color32(141, 43, 99, 255),

        //Blue
        (Color)new Color32(2, 188, 250, 255),
        (Color)new Color32(7, 50, 251, 255),
        (Color)new Color32(2, 28, 146, 255),
    };

    private PlayerController Owner;

    public void Spawn(Circle circle, PlayerController owner)
    {
        base.Spawn(circle.EntityId);
        SetColor(ColorPalette[circle.PlayerId % ColorPalette.Length]);

        this.Owner = owner;
        GetComponentInChildren<TMPro.TextMeshProUGUI>().text = owner.Username;
    }

    public override void OnDelete(EventContext context)
    {
        base.OnDelete(context);
        Owner.OnCircleDeleted(this);
    }
}
At the top, we're just defining some possible colors for our circle. We've also created a spawn function which takes a Circle (same type that's in our circle table) and a PlayerController which sets the color based on the circle's player ID, as well as setting the text of the Cricle to be the player's username.
Note that the CircleController inherits from the EntityController, not MonoBehavior.
FoodController
Next open the FoodController.cs file and replace the contents with:
using SpacetimeDB.Types;
using Unity.VisualScripting;
using UnityEngine;

public class FoodController : EntityController
{
    public static Color[] ColorPalette = new[]
    {
        (Color)new Color32(119, 252, 173, 255),
        (Color)new Color32(76, 250, 146, 255),
        (Color)new Color32(35, 246, 120, 255),

        (Color)new Color32(119, 251, 201, 255),
        (Color)new Color32(76, 249, 184, 255),
        (Color)new Color32(35, 245, 165, 255),
    };

    public void Spawn(Food food)
    {
        base.Spawn(food.EntityId);
        SetColor(ColorPalette[EntityId % ColorPalette.Length]);
    }
}
PlayerController
Open the PlayerController script and modify the contents of the PlayerController script to be:
using System.Collections.Generic;
using System.Linq;
using SpacetimeDB;
using SpacetimeDB.Types;
using UnityEngine;

public class PlayerController : MonoBehaviour
{
    const int SEND_UPDATES_PER_SEC = 20;
    const float SEND_UPDATES_FREQUENCY = 1f / SEND_UPDATES_PER_SEC;

    public static PlayerController Local { get; private set; }

    private int PlayerId;
    private float LastMovementSendTimestamp;
    private Vector2? LockInputPosition;
    private List<CircleController> OwnedCircles = new List<CircleController>();

    public string Username => GameManager.Conn.Db.Player.PlayerId.Find(PlayerId).Name;
    public int NumberOfOwnedCircles => OwnedCircles.Count;
    public bool IsLocalPlayer => this == Local;

    public void Initialize(Player player)
    {
        PlayerId = player.PlayerId;
        if (player.Identity == GameManager.LocalIdentity)
        {
            Local = this;
        }
    }

    private void OnDestroy()
    {
        // If we have any circles, destroy them
        foreach (var circle in OwnedCircles)
        {
            if (circle != null)
            {
                Destroy(circle.gameObject);
            }
        }
        OwnedCircles.Clear();
    }

    public void OnCircleSpawned(CircleController circle)
    {
        OwnedCircles.Add(circle);
    }

    public void OnCircleDeleted(CircleController deletedCircle)
    {
        // This means we got eaten
        if (OwnedCircles.Remove(deletedCircle) && IsLocalPlayer && OwnedCircles.Count == 0)
        {
            // DeathScreen.Instance.SetVisible(true);
        }
    }

    public int TotalMass()
    {
        return (int)OwnedCircles
            .Select(circle => GameManager.Conn.Db.Entity.EntityId.Find(circle.EntityId))
            .Sum(e => e?.Mass ?? 0); //If this entity is being deleted on the same frame that we're moving, we can have a null entity here.
    }

    public Vector2? CenterOfMass()
    {
        if (OwnedCircles.Count == 0)
        {
            return null;
        }

        Vector2 totalPos = Vector2.zero;
        float totalMass = 0;
        foreach (var circle in OwnedCircles)
        {
            var entity = GameManager.Conn.Db.Entity.EntityId.Find(circle.EntityId);
            var position = circle.transform.position;
            totalPos += (Vector2)position * entity.Mass;
            totalMass += entity.Mass;
        }

        return totalPos / totalMass;
    }

    private void OnGUI()
    {
        if (!IsLocalPlayer || !GameManager.IsConnected())
        {
            return;
        }

        GUI.Label(new Rect(0, 0, 100, 50), $"Total Mass: {TotalMass()}");
    }

    //Automated testing members
    private bool testInputEnabled;
    private Vector2 testInput;

    public void SetTestInput(Vector2 input) => testInput = input;
    public void EnableTestInput() => testInputEnabled = true;
}
Let's also add a new PrefabManager.cs script which we can use as a factory for creating prefabs. Replace the contents of the file with:
using SpacetimeDB.Types;
using System.Collections;
using System.Collections.Generic;
using UnityEngine;

public class PrefabManager : MonoBehaviour
{
    private static PrefabManager Instance;

    public CircleController CirclePrefab;
    public FoodController FoodPrefab;
    public PlayerController PlayerPrefab;

    private void Awake()
    {
        Instance = this;
    }

    public static CircleController SpawnCircle(Circle circle, PlayerController owner)
    {
        var entityController = Instantiate(Instance.CirclePrefab);
        entityController.name = $"Circle - {circle.EntityId}";
        entityController.Spawn(circle, owner);
        owner.OnCircleSpawned(entityController);
        return entityController;
    }

    public static FoodController SpawnFood(Food food)
    {
        var entityController = Instantiate(Instance.FoodPrefab);
        entityController.name = $"Food - {food.EntityId}";
        entityController.Spawn(food);
        return entityController;
    }

    public static PlayerController SpawnPlayer(Player player)
    {
        var playerController = Instantiate(Instance.PlayerPrefab);
        playerController.name = $"PlayerController - {player.Name}";
        playerController.Initialize(player);
        return playerController;
    }
}
In the scene hierarchy, select the GameManager object and add the Prefab Manager script as a component to the GameManager object. Drag the corresponding CirclePrefab, FoodPrefab, and PlayerPrefab prefabs we created earlier from the project view into their respective slots in the Prefab Manager. Save the scene.
Hooking up the Data
We've now prepared our Unity project so that we can hook up the data from our tables to the Unity game objects and have them drawn on the screen.
Add a couple dictionaries at the top of your GameManager class which we'll use to hold onto the game objects we create for our scene. Add these two lines just below your DbConnection like so:
    public static DbConnection Conn { get; private set; }

    public static Dictionary<int, EntityController> Entities = new Dictionary<int, EntityController>();
    public static Dictionary<int, PlayerController> Players = new Dictionary<int, PlayerController>();
Next lets add some callbacks when rows change in the database. Modify the HandleConnect method as below.
    // Called when we connect to SpacetimeDB and receive our client identity
    void HandleConnect(DbConnection conn, Identity identity, string token)
    {
        Debug.Log("Connected.");
        AuthToken.SaveToken(token);
        LocalIdentity = identity;

        conn.Db.Circle.OnInsert += CircleOnInsert;
        conn.Db.Entity.OnUpdate += EntityOnUpdate;
        conn.Db.Entity.OnDelete += EntityOnDelete;
        conn.Db.Food.OnInsert += FoodOnInsert;
        conn.Db.Player.OnInsert += PlayerOnInsert;
        conn.Db.Player.OnDelete += PlayerOnDelete;

        OnConnected?.Invoke();

        // Request all tables
        Conn.SubscriptionBuilder()
            .OnApplied(HandleSubscriptionApplied)
            .SubscribeToAllTables();
    }
Next add the following implementations for those callbacks to the GameManager class.
    private static void CircleOnInsert(EventContext context, Circle insertedValue)
    {
        var player = GetOrCreatePlayer(insertedValue.PlayerId);
        var entityController = PrefabManager.SpawnCircle(insertedValue, player);
        Entities.Add(insertedValue.EntityId, entityController);
    }

    private static void EntityOnUpdate(EventContext context, Entity oldEntity, Entity newEntity)
    {
        if (!Entities.TryGetValue(newEntity.EntityId, out var entityController))
        {
            return;
        }
        entityController.OnEntityUpdated(newEntity);
    }

    private static void EntityOnDelete(EventContext context, Entity oldEntity)
    {
        if (Entities.Remove(oldEntity.EntityId, out var entityController))
        {
            entityController.OnDelete(context);
        }
    }

    private static void FoodOnInsert(EventContext context, Food insertedValue)
    {
        var entityController = PrefabManager.SpawnFood(insertedValue);
        Entities.Add(insertedValue.EntityId, entityController);
    }

    private static void PlayerOnInsert(EventContext context, Player insertedPlayer)
    {
        GetOrCreatePlayer(insertedPlayer.PlayerId);
    }

    private static void PlayerOnDelete(EventContext context, Player deletedvalue)
    {
        if (Players.Remove(deletedvalue.PlayerId, out var playerController))
        {
            GameObject.Destroy(playerController.gameObject);
        }
    }

    private static PlayerController GetOrCreatePlayer(int playerId)
    {
        if (!Players.TryGetValue(playerId, out var playerController))
        {
            var player = Conn.Db.Player.PlayerId.Find(playerId);
            playerController = PrefabManager.SpawnPlayer(player);
            Players.Add(playerId, playerController);
        }

        return playerController;
    }
Camera Controller
One of the last steps is to create a camera controller to make sure the camera moves around with the player. Create a script called CameraController.cs and add it to your project. Replace the contents of the file with this:
using System.Collections;
using System.Collections.Generic;
using UnityEngine;

public class CameraController : MonoBehaviour
{
    public static float WorldSize = 0.0f;

    private void LateUpdate()
    {
        var arenaCenterTransform = new Vector3(WorldSize / 2, WorldSize / 2, -10.0f);
        if (PlayerController.Local == null || !GameManager.IsConnected())
        {
            // Set the camera to be in middle of the arena if we are not connected or
            // there is no local player
            transform.position = arenaCenterTransform;
            return;
        }

        var centerOfMass = PlayerController.Local.CenterOfMass();
        if (centerOfMass.HasValue)
        {
            // Set the camera to be the center of mass of the local player
            // if the local player has one
            transform.position = new Vector3
            {
                x = centerOfMass.Value.x,
                y = centerOfMass.Value.y,
                z = transform.position.z
            };
        } else {
            transform.position = arenaCenterTransform;
        }

        float targetCameraSize = CalculateCameraSize(PlayerController.Local);
        Camera.main.orthographicSize = Mathf.Lerp(Camera.main.orthographicSize, targetCameraSize, Time.deltaTime * 2);
    }

    private float CalculateCameraSize(PlayerController player)
    {
        return 50f + //Base size
            Mathf.Min(50, player.TotalMass() / 5) + //Increase camera size with mass
            Mathf.Min(player.NumberOfOwnedCircles - 1, 1) * 30; //Zoom out when player splits
    }
}
Add the CameraController as a component to the Main Camera object in the scene.
Lastly modify the GameManager.SetupArena method to set the WorldSize on the CameraController.
    private void SetupArena(float worldSize)
    {
        CreateBorderCube(new Vector2(worldSize / 2.0f, worldSize + borderThickness / 2),
            new Vector2(worldSize + borderThickness * 2.0f, borderThickness)); //North
        CreateBorderCube(new Vector2(worldSize / 2.0f, -borderThickness / 2),
            new Vector2(worldSize + borderThickness * 2.0f, borderThickness)); //South
        CreateBorderCube(new Vector2(worldSize + borderThickness / 2, worldSize / 2.0f),
            new Vector2(borderThickness, worldSize + borderThickness * 2.0f)); //East
        CreateBorderCube(new Vector2(-borderThickness / 2, worldSize / 2.0f),
            new Vector2(borderThickness, worldSize + borderThickness * 2.0f)); //West

        // Set the world size for the camera controller
        CameraController.WorldSize = worldSize;
    }
Entering the Game
At this point, you may need to regenerate your bindings the following command from the blackholio/spacetimedb directory.
spacetime generate --lang csharp --out-dir ../Assets/module_bindingsThe last step is to call the enter_game reducer on the server, passing in a username for our player, which will spawn a circle for our player. For the sake of simplicity, let's call the enter_game reducer from the HandleSubscriptionApplied callback with the name "3Blave".
    private void HandleSubscriptionApplied(SubscriptionEventContext ctx)
    {
        Debug.Log("Subscription applied!");
        OnSubscriptionApplied?.Invoke();

        // Once we have the initial subscription sync'd to the client cache
        // Get the world size from the config table and set up the arena
        var worldSize = Conn.Db.Config.Id.Find(0).WorldSize;
        SetupArena(worldSize);

        // Call enter game with the player name 3Blave
        ctx.Reducers.EnterGame("3Blave");
    }
Trying it out
At this point, after publishing our module we can press the play button to see the fruits of our labor! You should be able to see your player's circle, with its username label, surrounded by food.
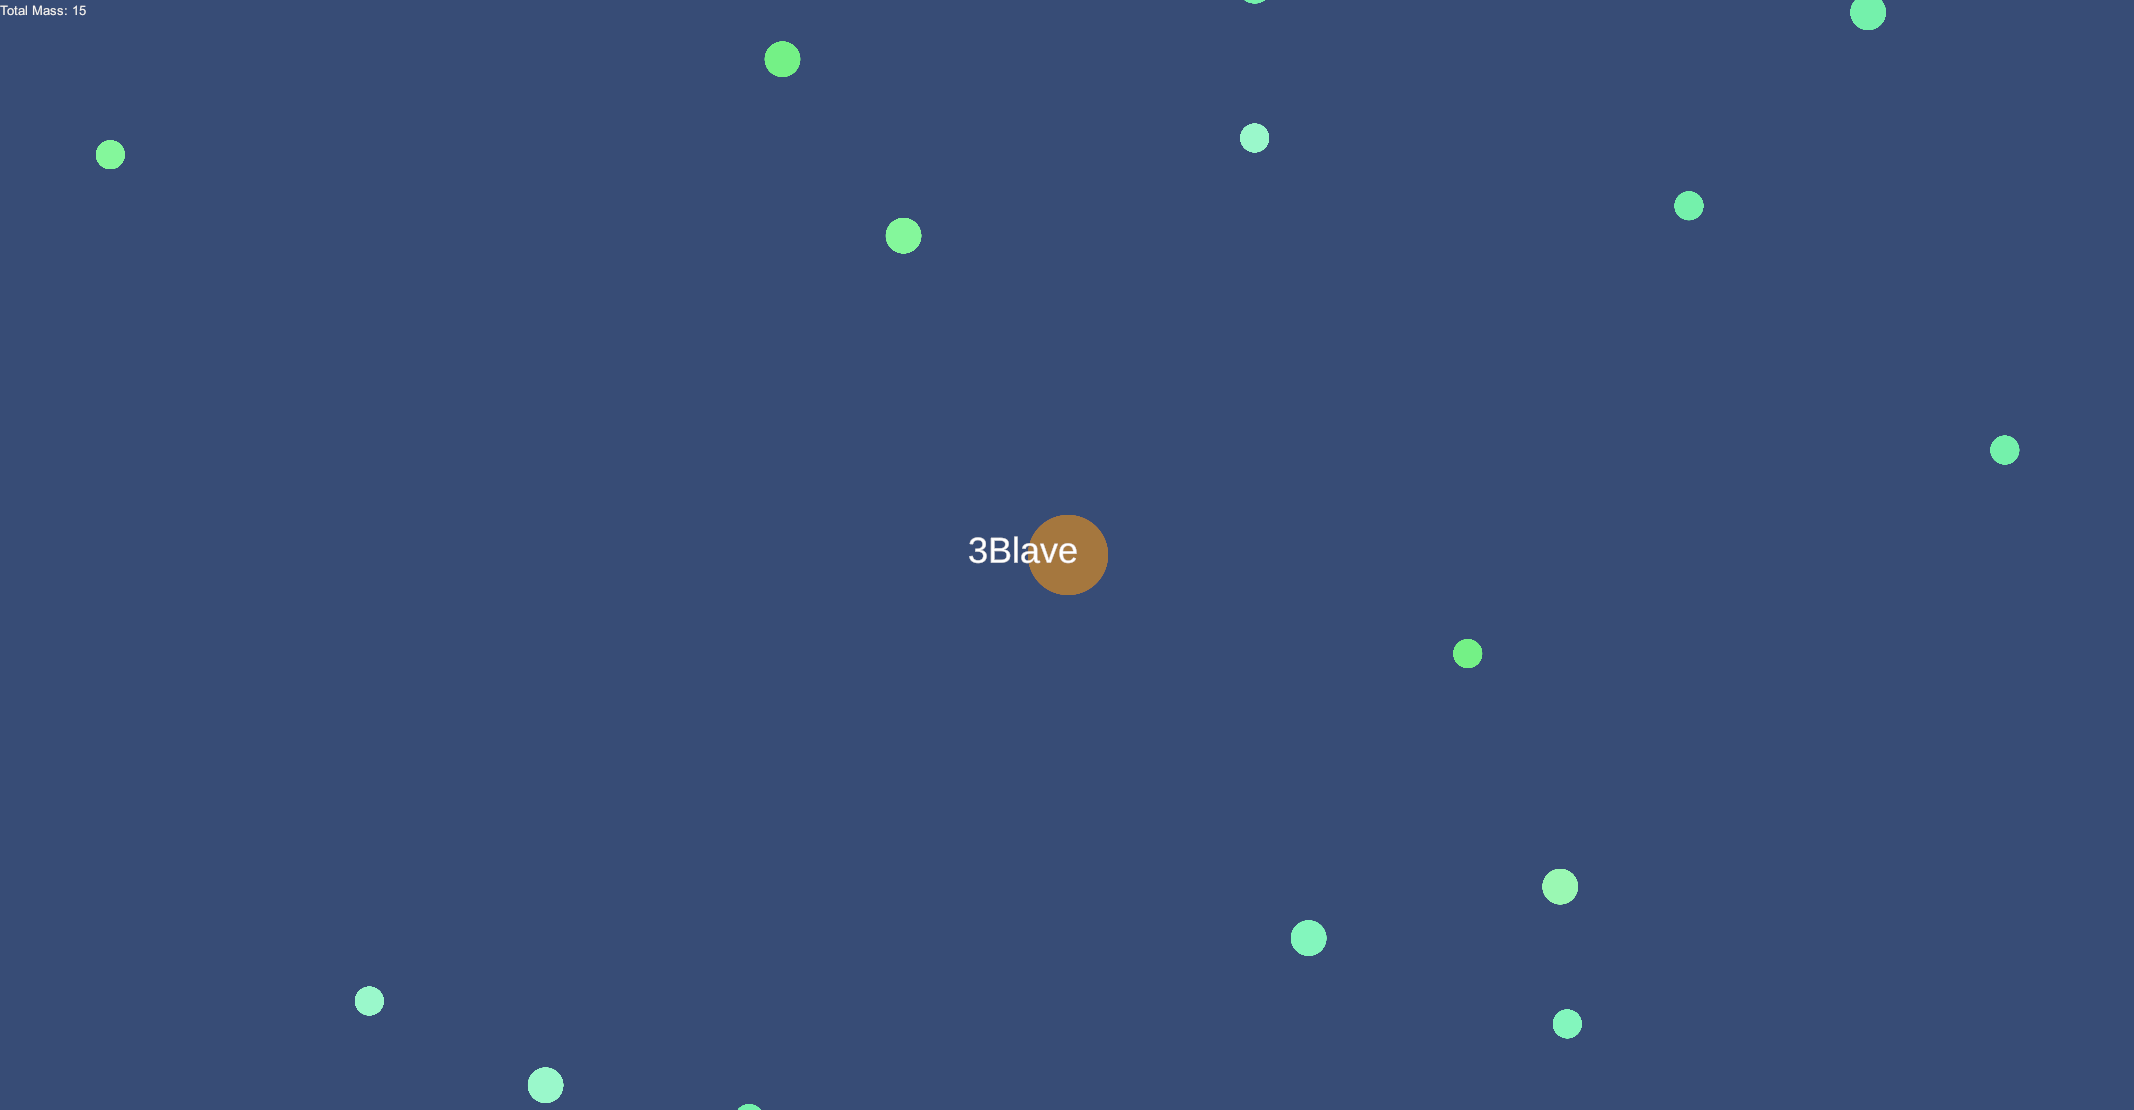
The label won't be centered at this point. Feel free to adjust it if you like. We just didn't want to complicate the tutorial.
Troubleshooting
-
If you get an error when running the generate command, make sure you have an empty subfolder in your Unity project Assets folder called
module_bindings -
If you get an error in your Unity console when starting the game, double check that you have published your module and you have the correct module name specified in your
GameManager.
Next Steps
It's pretty cool to see our player in game surrounded by food, but there's a problem! We can't move yet. In the next part, we'll explore how to get your player moving and interacting with food and other objects.