

Configuring a SpacetimeAuth Project
Note
⚠️ SpacetimeAuth is currently in beta, some features may not be available yet or may change in the future. You might encounter bugs or issues while using the service. Please report any problems you encounter to help us improve SpacetimeAuth.
SpacetimeAuth projects can be configured to suit your application's needs. This guide will walk you through the various configuration options available in the SpacetimeAuth dashboard and through various common use cases like setting up third-party identity providers.
Managing Clients
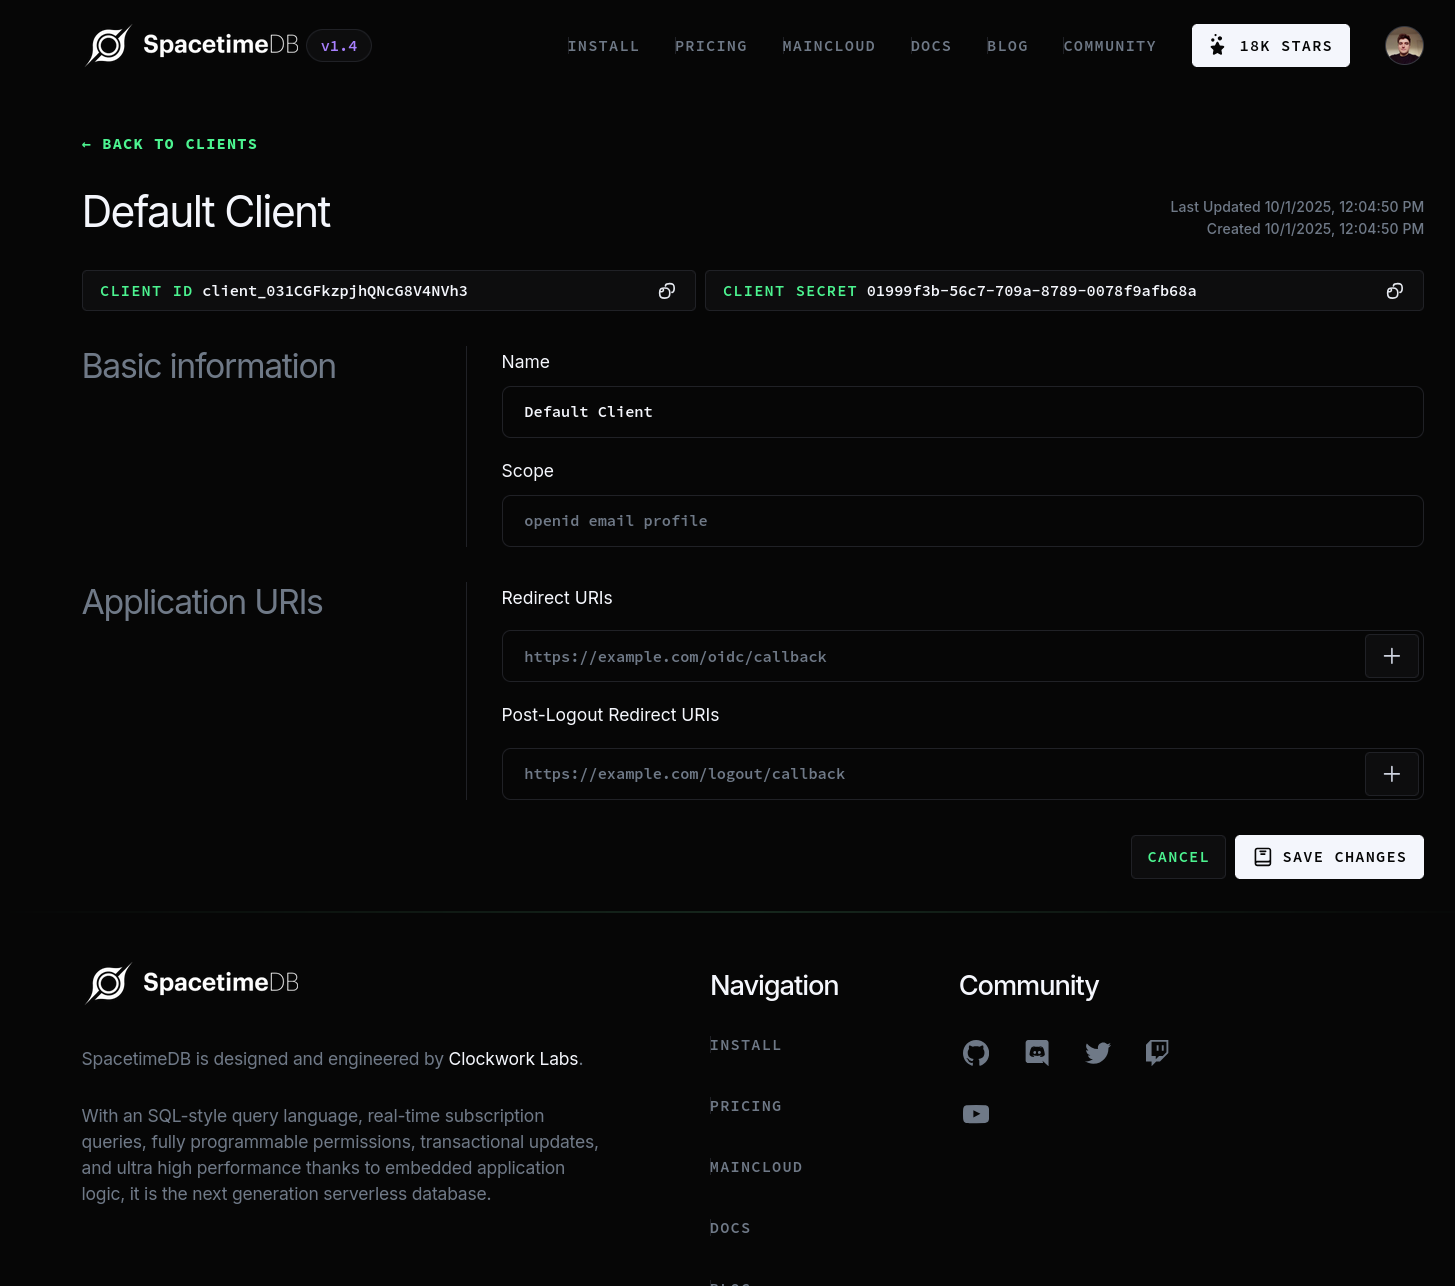
Clients represent applications that will use SpacetimeAuth for authentication. Each client has its own set of settings, including redirect URIs, post logout URIs, and name.
You can manage clients by navigating to the "Clients" tab in your
SpacetimeAuth project dashboard.
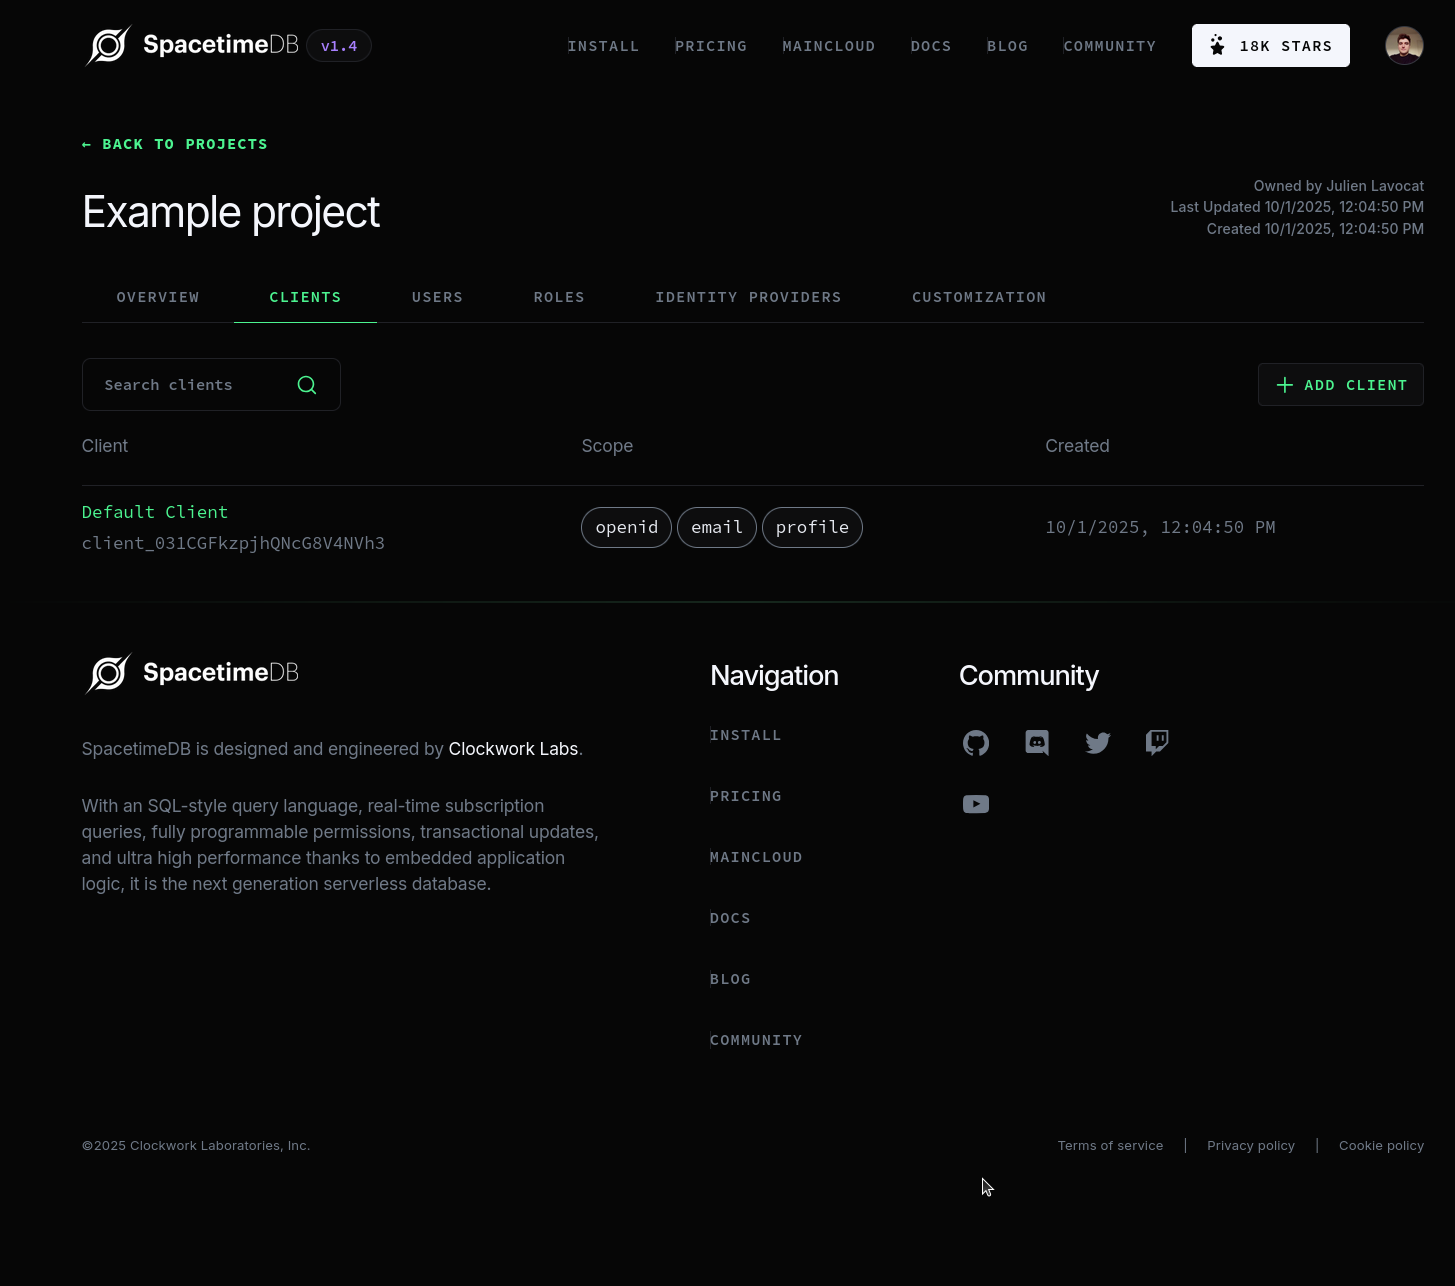 Every project comes with a default client that you can use to get started.
You can also create additional clients by clicking the "Create Client" button.
Every project comes with a default client that you can use to get started.
You can also create additional clients by clicking the "Create Client" button.
The majority of projects will only need a single client to authenticate users to their SpacetimeDB module. You may want to create multiple clients if you have multiple applications (e.g. a sidecar, admin panel, etc.) and want to use different authentication flows or settings for each application.
When creating or editing a client, you can configure the following settings:
- Name: The name of the client (e.g. "My Web App").
- Redirect URIs: The URIs to which SpacetimeAuth allows to redirect the user after a successful login. These must match the URIs used in your application.
- Post Logout Redirect URIs: The URIs to which SpacetimeAuth allows to redirect the user after a logout. These must match the URIs used in your application.
Note
⚠️Remember to keep your client secret secure, never expose it in client-side code or public repositories. You can freely share the client ID as it is not sensitive information. Client secrets are only used during the
client_credentialsflow, allowing you to get a token with no user context (thesubclaim will be set to the client ID).`
Scopes and Claims
Scopes are not yet editable and are currently limited to openid, profile,
and email. These scopes are sufficient for most applications, as they provide
all the necessary information about the authenticated user.
Here are the claims (i.e, user information available in the ID token) provided by
each scope:
| Scope | Claims |
|---|---|
| openid (required) | sub (unique user identifier) |
| profile | name, family_name, given_name, middle_name, nickname, preferred_username, picture, website, gender, birthdate, zoneinfo, locale, updated_at |
email, email_verified |
You can request all or a subset of these scopes when initiating the authentication flow in your application.
Redirect URIs
Redirect URIs are a critical part of the OAuth2 and OpenID Connect flows. They ensure that after a user authenticates, they are redirected back to a trusted location in your application.
When configuring redirect URIs for your client, ensure that they match the URIs
used in your application. This includes the scheme (http or https), domain,
port (if applicable), and path.
For example, if your application is hosted at https://myapp.com and you
initiate the authentication flow from https://myapp.com/login, you might
set the redirect URI to https://myapp.com/callback.
To find the correct redirect URIs for your application, refer to the documentation of the authentication library you are using or check out our integration guides with various frameworks.
Setting Up Third-Party Identity Providers
SpacetimeAuth supports multiple third-party identity providers, allowing users to authenticate using their existing accounts. Supported providers include:
- GitHub
- Discord
- Twitch
- Kick
- More providers will be added in the future
User's information from third-party identity providers is mapped to the standard
OpenID Connect claims used by SpacetimeAuth. This ensures a consistent user
experience regardless of the identity provider used.
For example the username claim is mapped to the standard preferred_username claim.
You can manage identity providers by navigating to the "Identity Providers" tab in your SpacetimeAuth project dashboard.
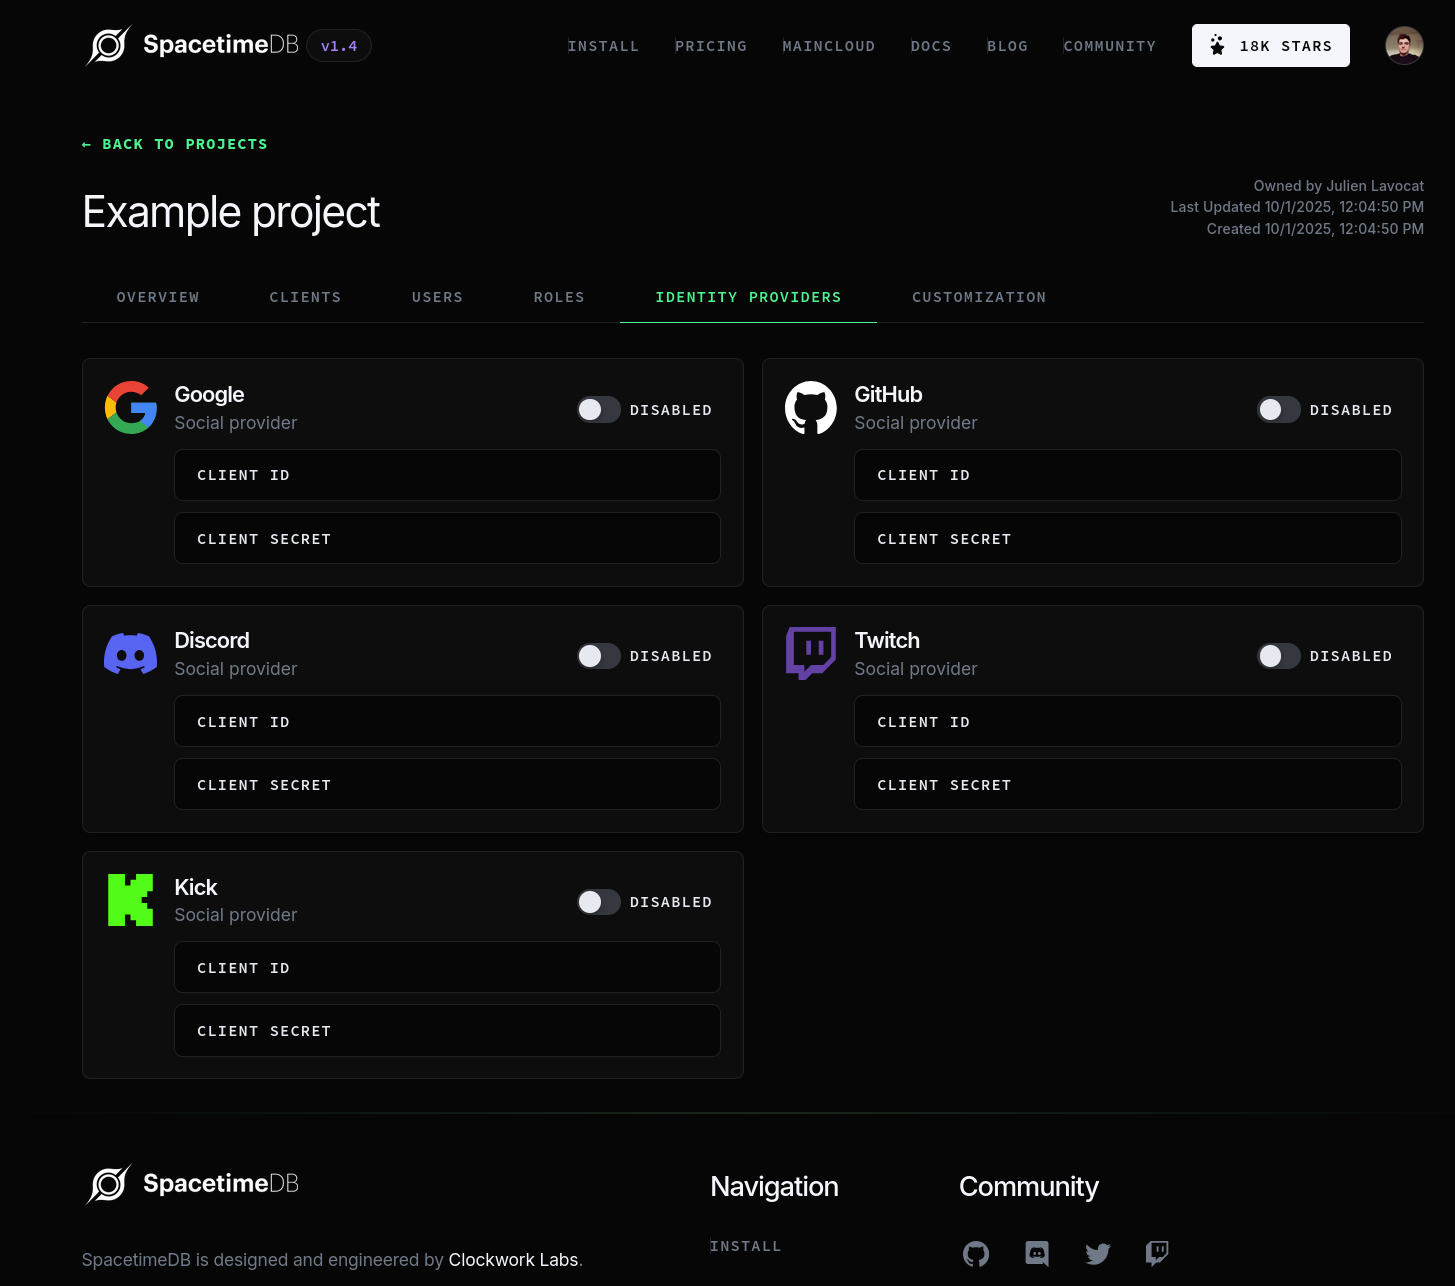
Since SpacetimeAuth acts as a client for the external identity provider, you need to provide the client ID and client secret obtained from the provider's developer console in order to enable the provider. You must also configure the redirect URI in the provider's developer console to point to SpacetimeAuth (see below). You can also choose to enable or disable the provider. After entering the required information, click "Save" and the provider will be available on the login page of your application.
Here are guides to help you create the required OAuth application (sometimes called an OAuth App or OAuth Client):
Here are the redirect URIs you need to configure for each enabled provider:
| Provider | Redirect URI |
|---|---|
https://auth.spacetimedb.com/interactions/federated/callback/google |
|
| GitHub | https://auth.spacetimedb.com/interactions/federated/callback/github |
| Discord | https://auth.spacetimedb.com/interactions/federated/callback/discord |
| Twitch | https://auth.spacetimedb.com/interactions/federated/callback/twitch |
| Kick | https://auth.spacetimedb.com/interactions/federated/callback/kick |
Next Steps
Now that you have created and configured a SpacetimeAuth project, you can start integrating it into your application. Before writing code, we recommend verifying your setup with a quick test.